logo
  • Back to EIZ
  • Support Docs

What is EIZ?

Shipmarvel User Guide

54
  • ShipMarvel (legacy version)
    • Self-Onboarding
      • Quick guide to processing your orders
      • Self-Onboarding with Shipmarvel
    • Integrations
      • Channels
        • How to integrate Tradevine (Trademe)
        • How to integrate PrestaShop
        • How to integrate Neto (Maropost)
        • How to integrate Catch
        • How to integrate BigCommerce
        • How to integrate Amazon
        • How to integrate eBay
        • How to integrate Shopify
        • How to integrate WooCommerce
        • How to integrate Kogan
        • How to integrate CIN7
        • How to integrate Unleashed
        • How to integrate CIN7 Core (Dear)
        • How to integrate Groupon
        • How to integrate Magento 2
        • How to integrate Bunnings
        • How to integrate MyDeal
        • How to integrate Shopline
      • Couriers
        • How to integrate MyPost Business
        • How to integrate CouriersPlease
        • How to integrate eParcel
        • How to integrate Aramex myFastway
        • How to integrate Sendle
    • Insights
      • Insights of your online business
    • New Orders
      • How to create an order
      • How to manage your new orders
      • How to change shipping carrier
    • Ready to Ship
      • How to print shipping labels
      • Book in your courier for pickup
    • Tracking
      • Tracking your shipments
    • Listing
      • How to manage your Listings
    • Carrier
      • Quick Quote
      • Searching for Consignments
  • ShipMarvel Pro
    • Dashboard
    • Send Parcels
    • What are Label Credits?
    • Top Up Balance for Shipping Costs
    • Action Required
    • Products
    • Manual Order
    • New Orders
    • Awaiting Dispatch
    • Billing
    • Completed
    • Connections
      • Channels
        • How to integrate Shopify
        • How to Integrate eBay
        • How to Integrate Amazon
        • How to Integrate WooCommerce
      • Couriers
        • How to Integrate MyPost Business
        • How to Integrate eParcel
        • How to Integrate AramexConnect
        • How to Integrate CouriersPlease

Lofko User Guide

43
  • EIZ Fulfillment Orders
    • How to change the order of Tabs
    • How to delete a Tab
    • How to add a new Tab
    • How to filter by all express orders
    • How to combine same address orders
    • How to use the Tabs function
    • How to use the Orders function
  • EIZ Fulfillment Shipments
    • How to sort the picking slip by the items
    • How to cancel a shipment
    • How to print an address label for a letter
    • How to create Shipments from orders
  • EIZ Fulfillment Settings
    • How to add multiple sender addresses
    • How to add new package information
    • How to add the SKU or SRN on a shipping label
    • How to view and download tax invoices
    • EIZ Fulfillment Sales Channel Setting
      • How to connect Woocommerce
      • How to connect Shopify
      • How to connect Tradevine (Trademe)
      • How to connect Prestashop
      • How to connect Neto (Maropost)
      • How to connect Magento
      • How to connect Kogan
      • How to connect Groupon
      • How to connect Cin7 Core (Dear)
      • How to connect Amazon
      • How to connect Cin7
      • How to connect Catch
    • EIZ Fulfillment Carrier Setting
      • How to setup MyPost Business on EIZ Fulfillment
      • How to setup Hunter Express on EIZ Fulfillment
      • How to setup Toll on EIZ Fulfillment
      • How to setup TNT on EIZ Fulfillment
      • How to setup Startrack on EIZ Fulfillment
      • How to setup Sendle on EIZ Fulfillment
      • How to setup DHL
      • How to setup Couriers Please
      • How to setup Border Express
      • How to setup Aramex International
      • How to setup Australia Post letter
      • How to setup Australia Post eParcel
      • How to setup Allied Express
      • How to setup MyFastway on EIZ Fulfillment
  • EIZ Fulfillment Dashboard
    • How to use Dashboard function
  • Video Guide
    • Video Guide

Troubleshooting FAQs

5
  • Why is my shipping calculation incorrect or not displaying any prices at checkout?
  • Why are my WooCommerce orders not syncing?
  • I can’t see any shipping quotes in EIZ?
  • Printer-Agent Software Installation Guide for Mac users
  • eBay orders stopped syncing to my EIZ account

Woocommerce EIZ App Setting

1
  • How to integrate WooCommerce
View Categories
  • Home
  • Docs
  • Lofko User Guide
  • EIZ Fulfillment Settings
  • EIZ Fulfillment Sales Channel Setting
  • How to connect Magento

How to connect Magento

1 min read

0:00 / 1:21
  • View as Markdown Open this page as plain Markdown (opens in a new tab)
  • Open in ChatGPT Ask questions about this page (opens in a new tab)
  • Open in Claude Ask questions about this page (opens in a new tab)
  • Open in Google AI Studio Ask questions about this page (Google account required) (opens in a new tab)

In order to integrate your Magento store to Lofko, you’ll need to retrieve some information from within your Magento account. See the following information on how to do this.

How to get your API information from Magento 2 #

PLEASE NOTE: This information may be outdated, please check with Magento support on up to date information if the instructions differ to what you see in your Magento account.

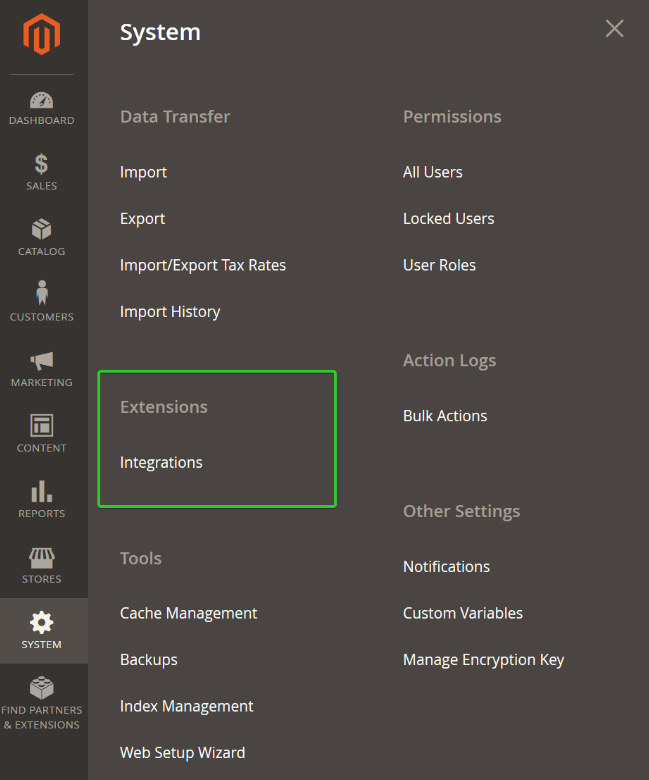
Login to your Admin > System > Extensions > Integrations
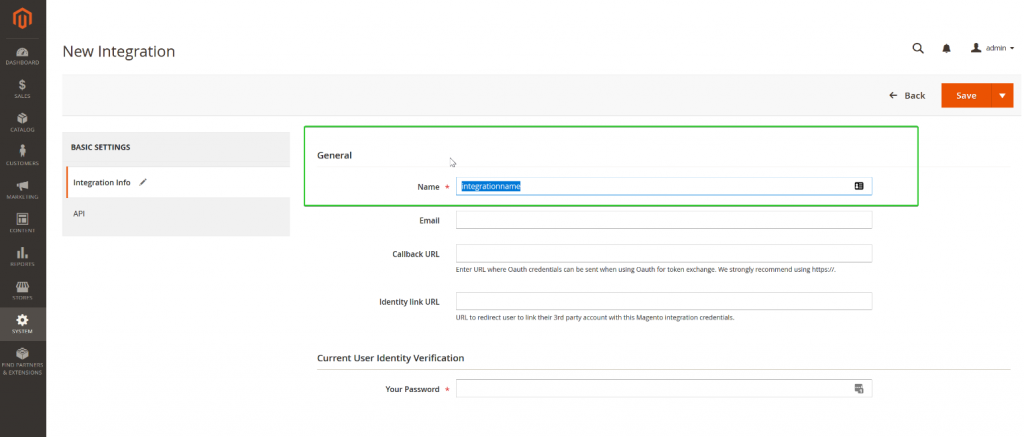
Click Add New Integration and enter in a unique name for your integration.

In the Your Password field, enter in your admin password.

You can leave the other fields blank.
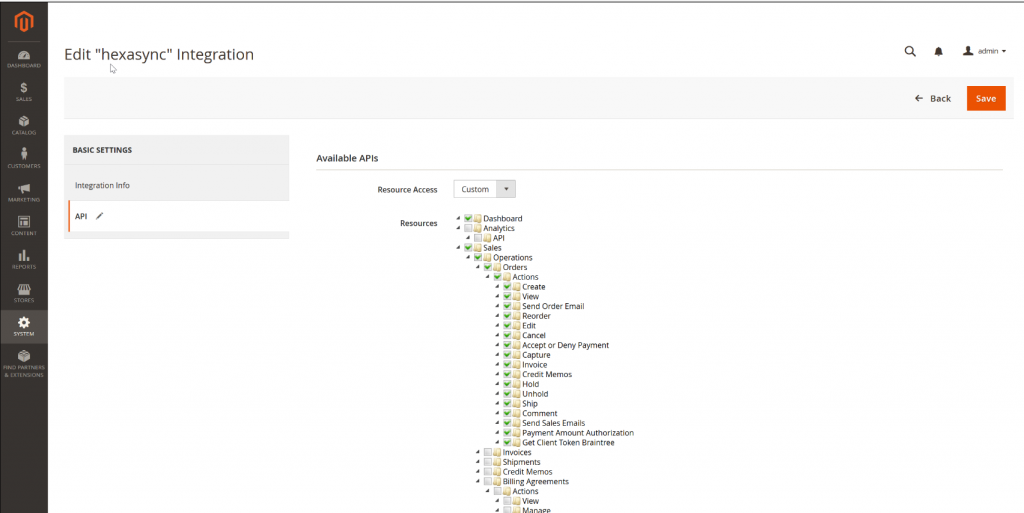
On the left, click the API tab and choose all the access resources for the integration, then click the Save button.
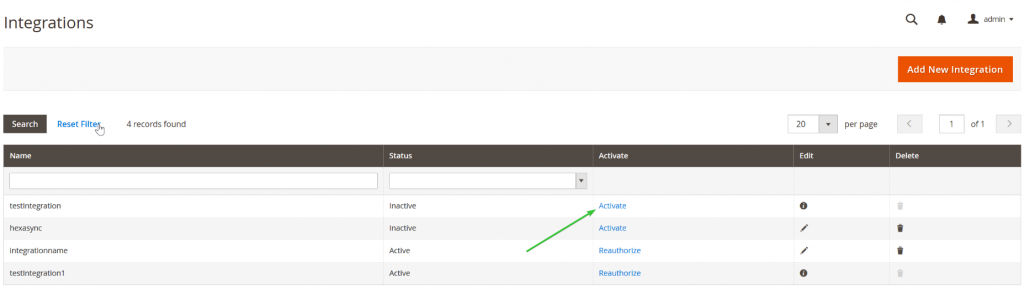
Click on the Activate link that corresponds with your newly created integration.
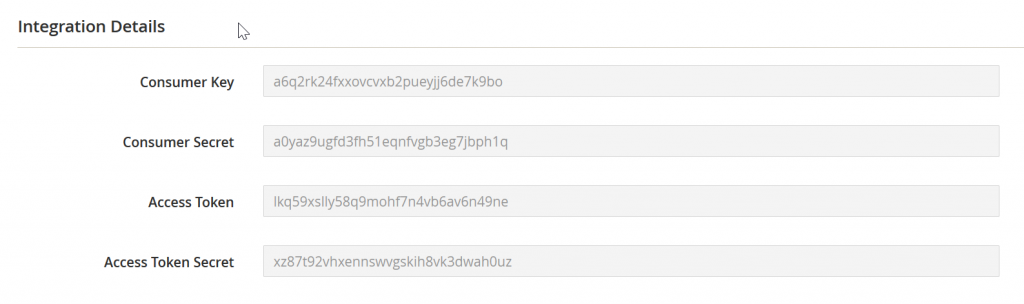
Click the Allow button, to see this dialogue box with your API information for the next section. Please copy and paste these into a notepad document for later use.
How to integrate Magento 2 #

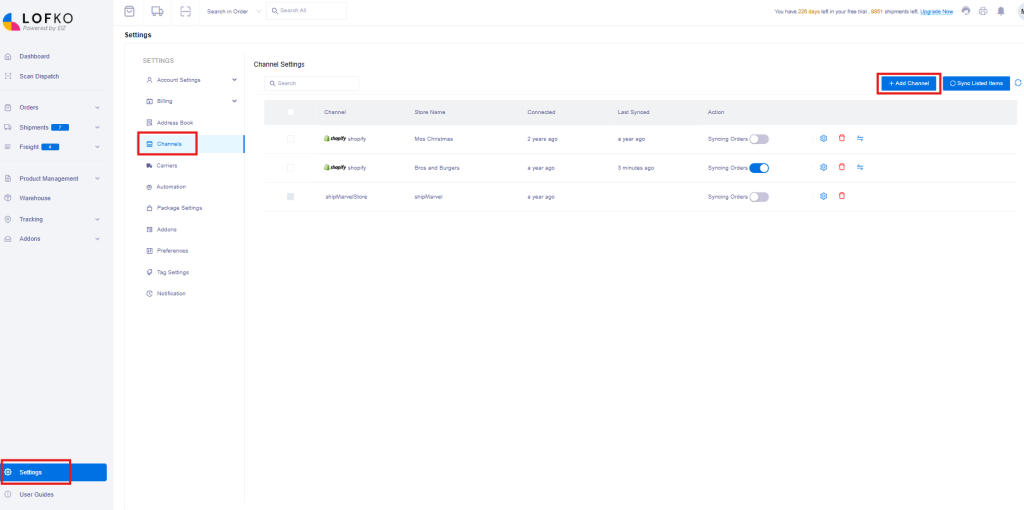
Login to your Lofko account > Settings > Channels > click the Add Channel button:
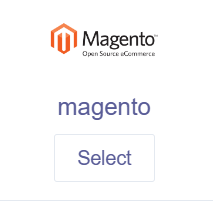
Locate the Magento icon and click Select:
Enter in the details you retrieved from the first section above, then click Next:

Once your store is integrated, go back to the Integrations section and you should see your Magento store showing. Click the Syncing Orders toggle to blue to start syncing your orders into Lofko and begin processing!

Updated on June 3, 2025

What are your Feelings

  • Happy
  • Normal
  • Sad

Share This Article :

  • Facebook
  • X
  • LinkedIn
  • Pinterest
How to connect Neto (Maropost)How to connect Kogan

Powered by BetterDocs

Table of Contents
  • How to get your API information from Magento 2
  • How to integrate Magento 2

Stay up to date with EIZ