You will first need to generate the API keys for your WooCommerce user, then apply those API keys to EIZ to complete the integration.
Step 1: Generate REST API Key in the WordPress admin interface
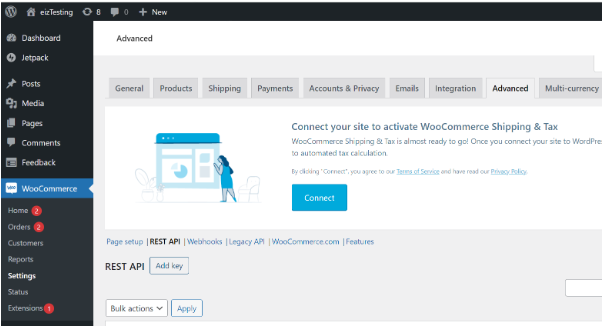
To create or manage keys for a specific WordPress user, go to WooCommerce > Settings > Advanced > REST API > Click the Add Key button:
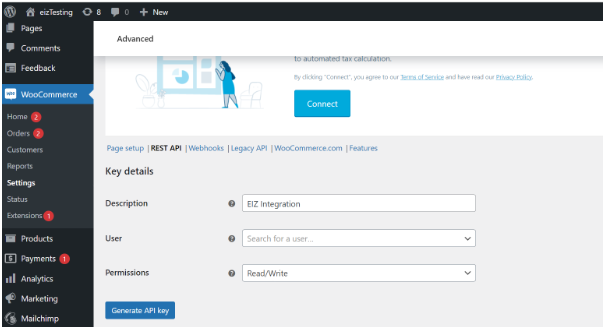
In the next screen, add a description and select the WordPress user you would like to generate the key for. Use of the REST API with the generated keys will conform to that user’s WordPress roles and capabilities. The permissions need to be “Read/Write” then click Generate API Key button:
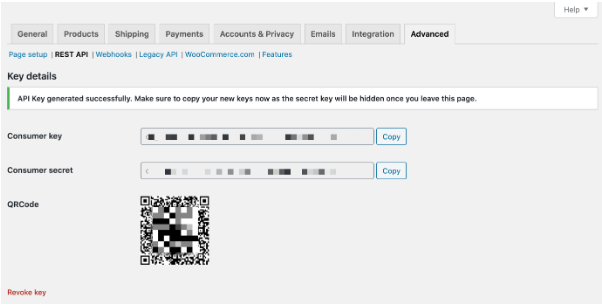
Copy and save the generated Consumer Key and Consumer Secret to a safe place.
Step 2: Change permalink format.
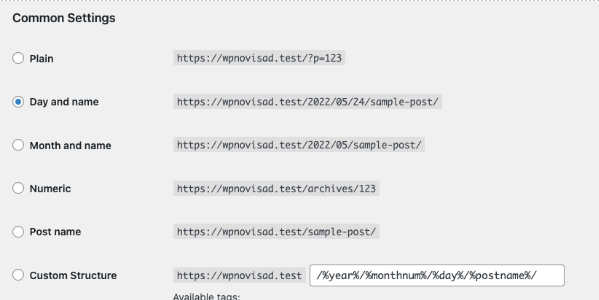
In order to access the REST API using the standard endpoint URI structure (e.g. wc/v3/products), you must have your WordPress permalinks configured to something other than “Plain”.
Go to Settings > Permalinks and choose an option:
Should you run into an issue performing the above steps, please see this reference for further explanations:
https://developer.woocommerce.com/docs/getting-started-with-the-woocommerce-rest-api/
Step 3: Integrate to EIZ
Log into your EIZ account > click Integrations > in the Channels section, find the WooCommerce icon > click the plus symbol:
If you’re using Lofko, click Settings > Channels > click the Add Channel button.
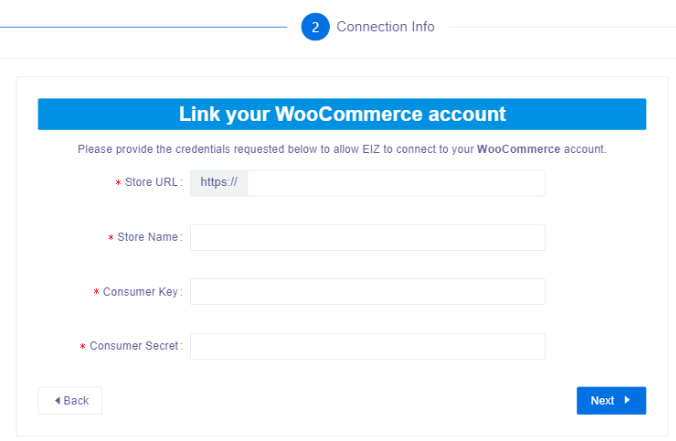
Copy and paste your WooCommerce URL, Store Name, Consumer Key and Consumer Secret, then click Next until finish.
Go back to your EIZ account and you should now see a WooCommerce icon with your store name associated to it. Ensure the syncing order toggle is turned on, and you can now begin processing your orders with EIZ!


